
How to Make the Perfect Apple Pie (Step-by-Step with Photos)
First things first: there’s no such thing as the perfect apple pie. The perfect apple pie is whichever apple pie you love the most. That said: there are good apple pies and there are bad apple pies. Bad apple pies have a stiff, flavorless crust and a gooey, sticky, synthetic filling. They taste like something you defrosted from the freezer section of a bodega instead of something that was made with love.
A good apple pie tastes like a pastry-wrapped present of gorgeous apples, doctored ever so slightly with sugar and cinnamon, and thickened to draw out the complex flavors you get when you use a nice variety.

Unlike most gifts, the wrapping matters more than the present here: you want a flaky, flavorful crust and that’s not easy to achieve the first time around. There are many pitfalls along the way — overworking the dough, using too much water — and I’ve made every mistake you can possibly make and guess what you still have at the end? Pie. So it’s always worth giving it a go. And now that I’ve probably made over a hundred apple pies — I’m married to an apple pie aficionado — I feel confident enough to teach you how to do it.
So let me walk you through the process.
Step One: Make the Pie Dough
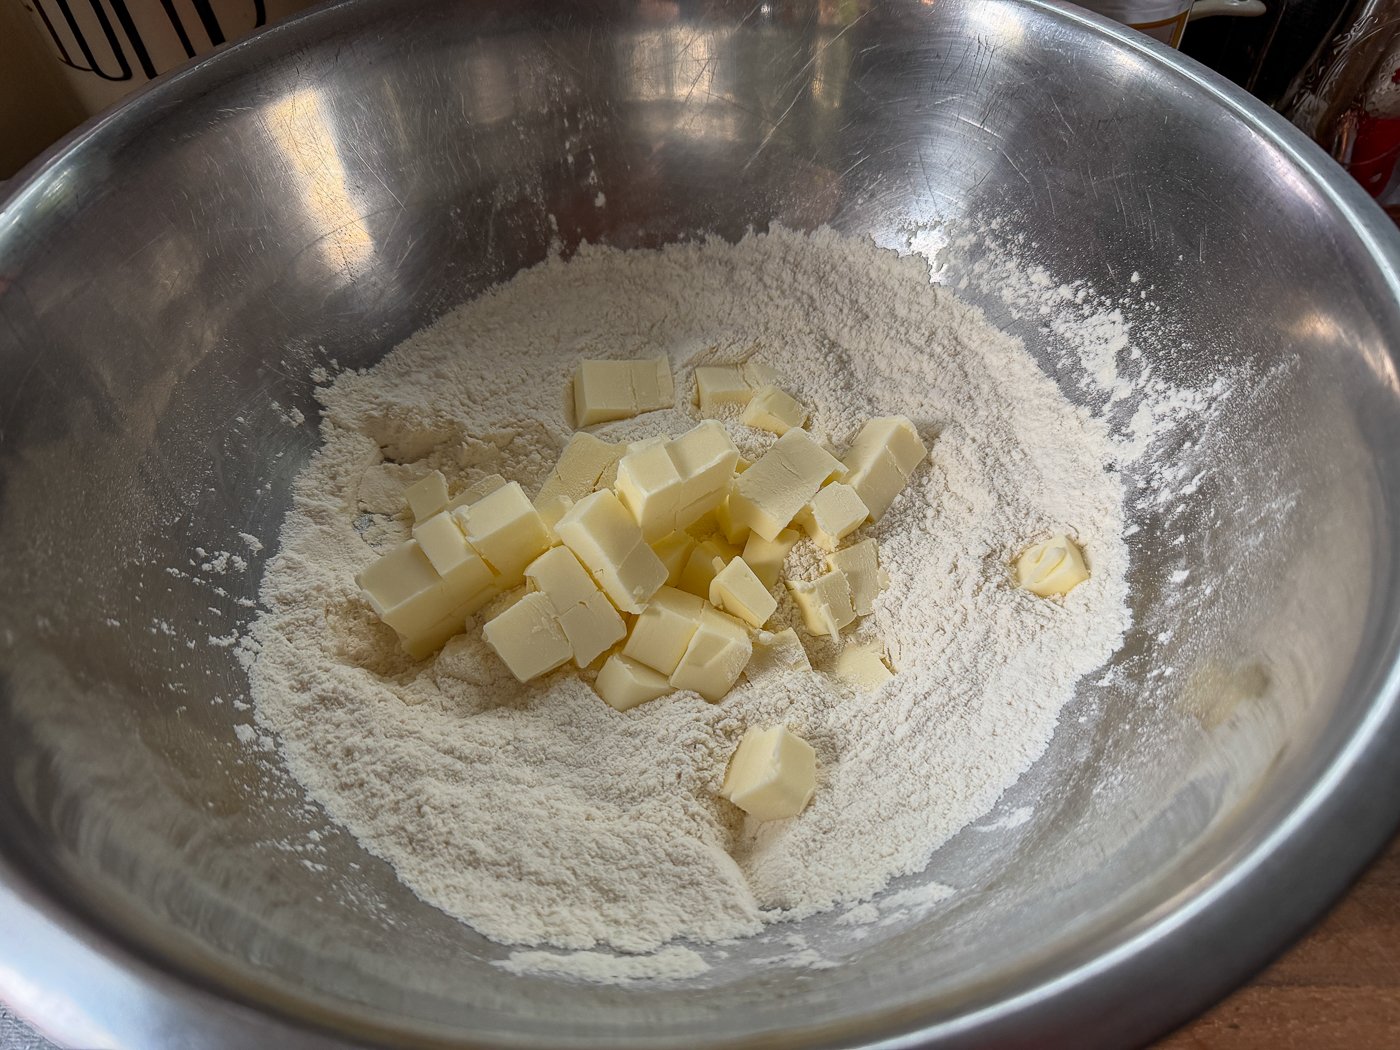
In a large bowl, whisk together 2 1/2 cups all-purpose flour, 1 teaspoon of kosher salt, and 1 tablespoon of sugar. Add two sticks of very cold butter that you’ve cut into cubes.
Now, with your fingers, start pinching the butter into the flour. This will take at least three minutes, probably more. Your goal is for the flour to start to look like slightly wet sand and for there to be a few pea-sized pieces of flour-coated butter in there too.
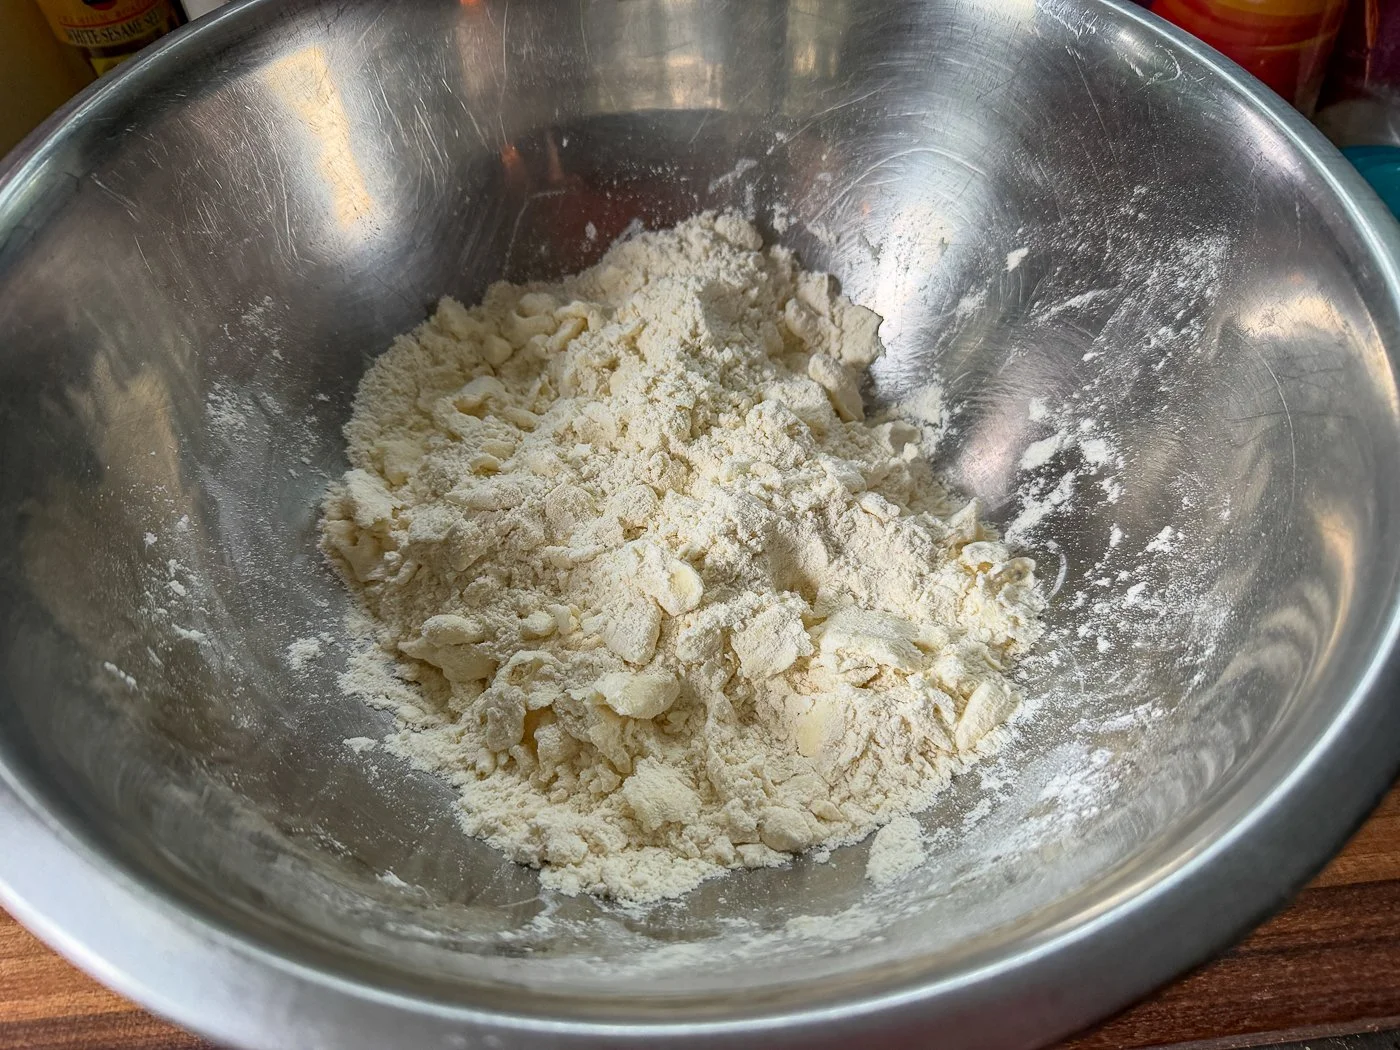
At this point, you add your water. Fill a small measuring cup with ice and cold water, stir it together to get the water really cold, and then add a tablespoon or two to your butter/flour mix. Drizzle it over and then toss everything around like you’re tossing a salad lightly with your hands. You should be able to see visually if the flour is moistened enough; if you still see bits of very white flour, add a little more water.
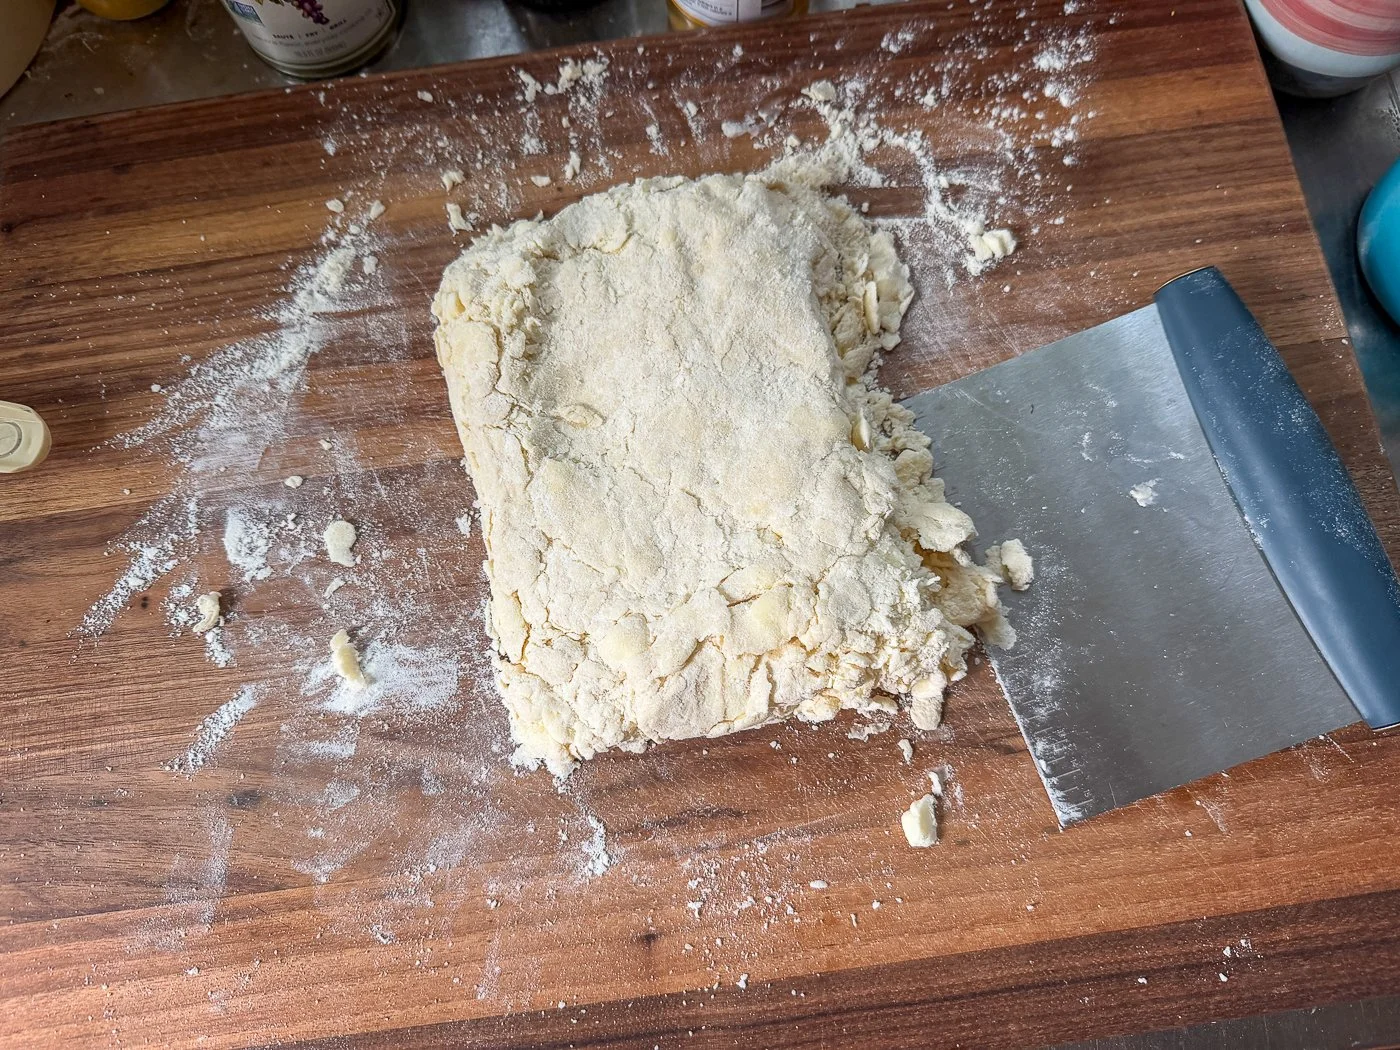
The key step here is to see if the dough holds together. You want to add as little water as possible to make the dough hold together; the way to tell is to grab a handful of dough and squeeze it: if it stays together in one piece, you’re ready. If not, keep adding cold water a tablespoon at a time. The more water you add, the tougher your dough will be, so that’s why this is a delicate process. When the dough holds together, dump it on to a floured board.

Now it’s a game of bringing this dough even more so that you can form two solid discs. The way to do that is to knead it a little, using a bench scraper to collect the pieces that fall away.

Because you haven’t added too much water, you’re less likely to develop the gluten when you knead it: you’re really just making everything cohere. Eventually, you can shape it into a rectangle.
Then fold the bottom part up 2/3rds of the way and the top part over that to reach the bottom and press down: this will give you nice layers. Divide that dough in two with your bench scraper and shape each half into a disc, kneading and pressing as necessary so it’s truly a solid disc. You don’t want it to crack when you roll it out later.
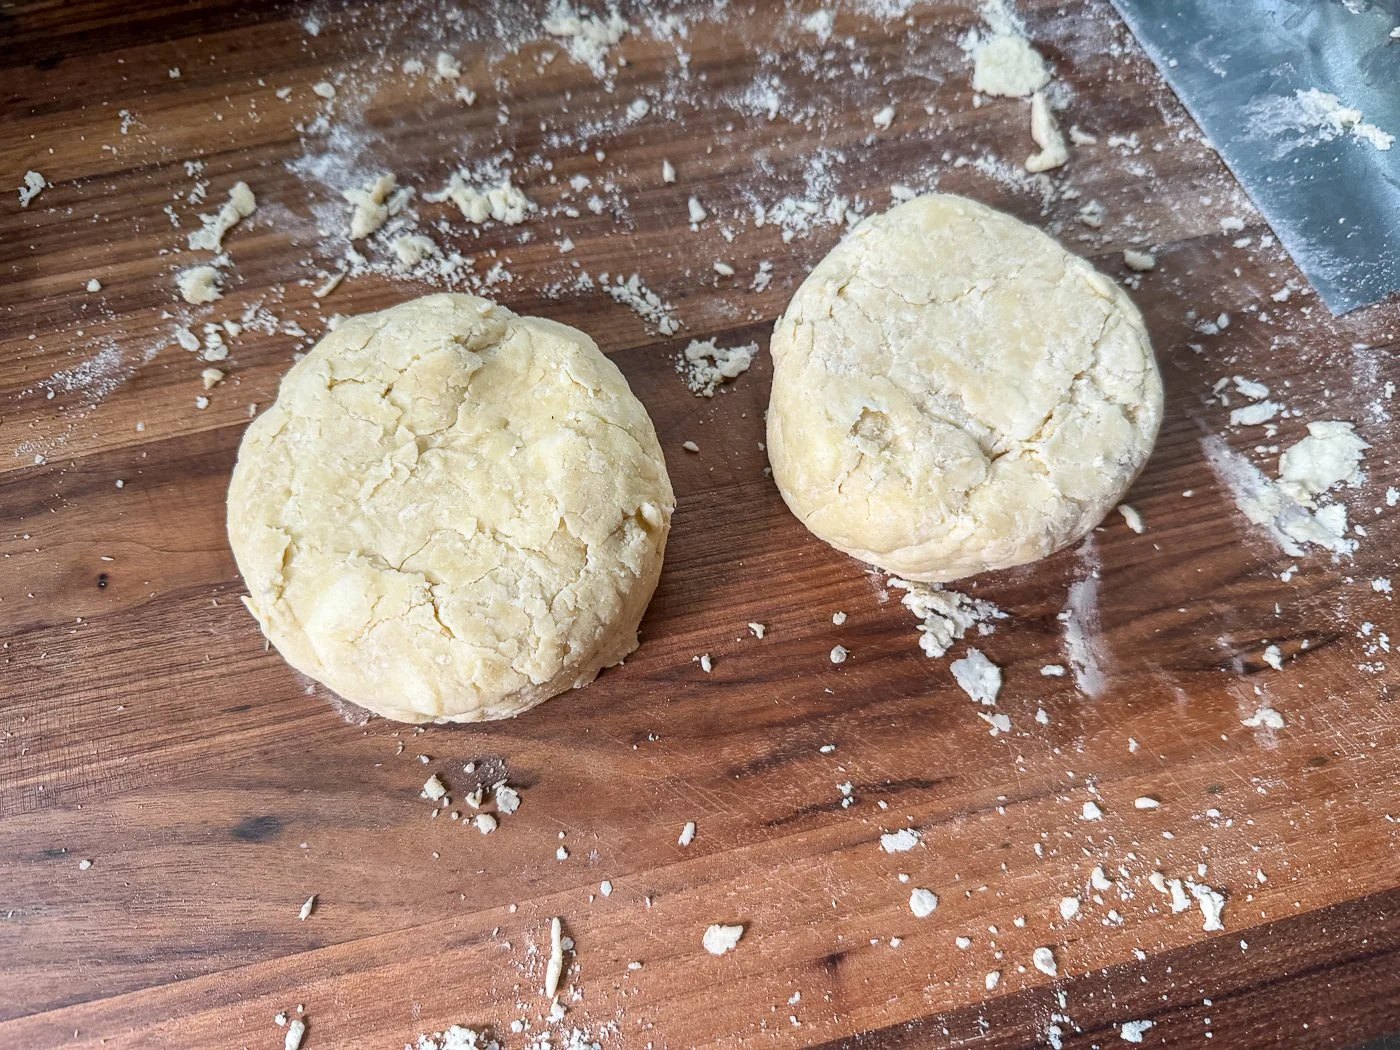
Wrap those discs in plastic and refrigerate for at least an hour. That will let the dough hydrate so that it holds together when you roll it.
Step Two: Prep the Apples
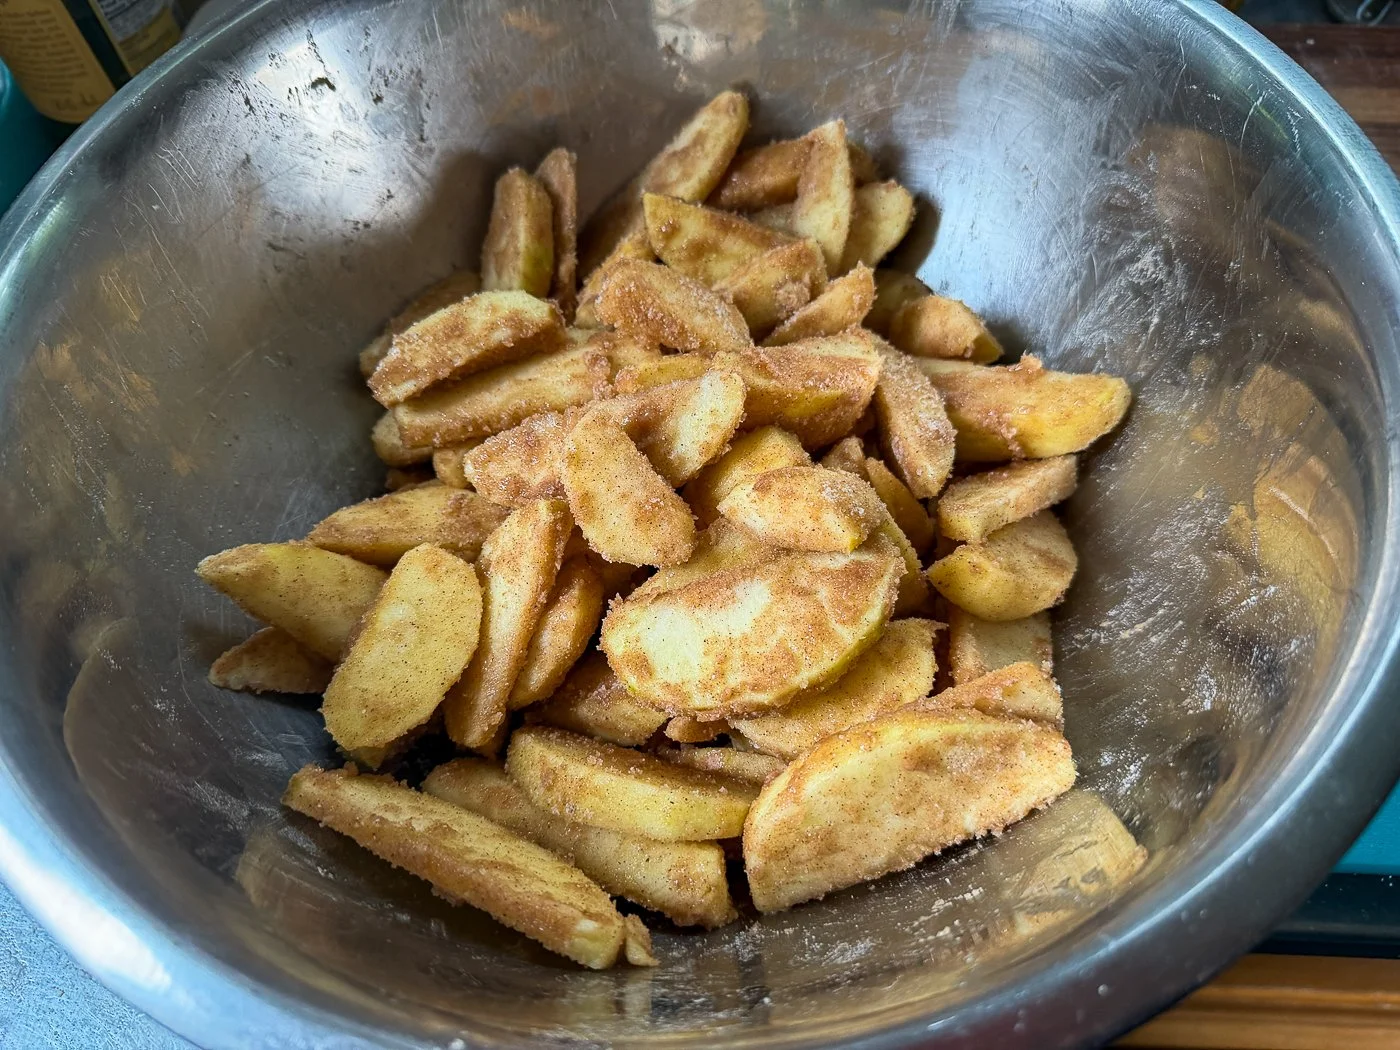
There are all kinds of ways to prep your apples for an apple pie — you can pre-cook them, you can add orange zest and vanilla beans — but I like to keep it simple, using a recipe from my father-in-law, Steve. Take seven to eight medium-sized apples (I like a variety: Pink Lady, Granny Smith, Jonagold, the more the merrier), core them, peel them, and cut them into wedges. Immediately toss them in a bowl with 1 cup of granulated sugar, 1 teaspoon kosher salt, 1/3 cup all-purpose flour, and 1 tablespoon cinnamon (I really like Burlap and Barrel’s).
Step Three: Roll Out Your Dough

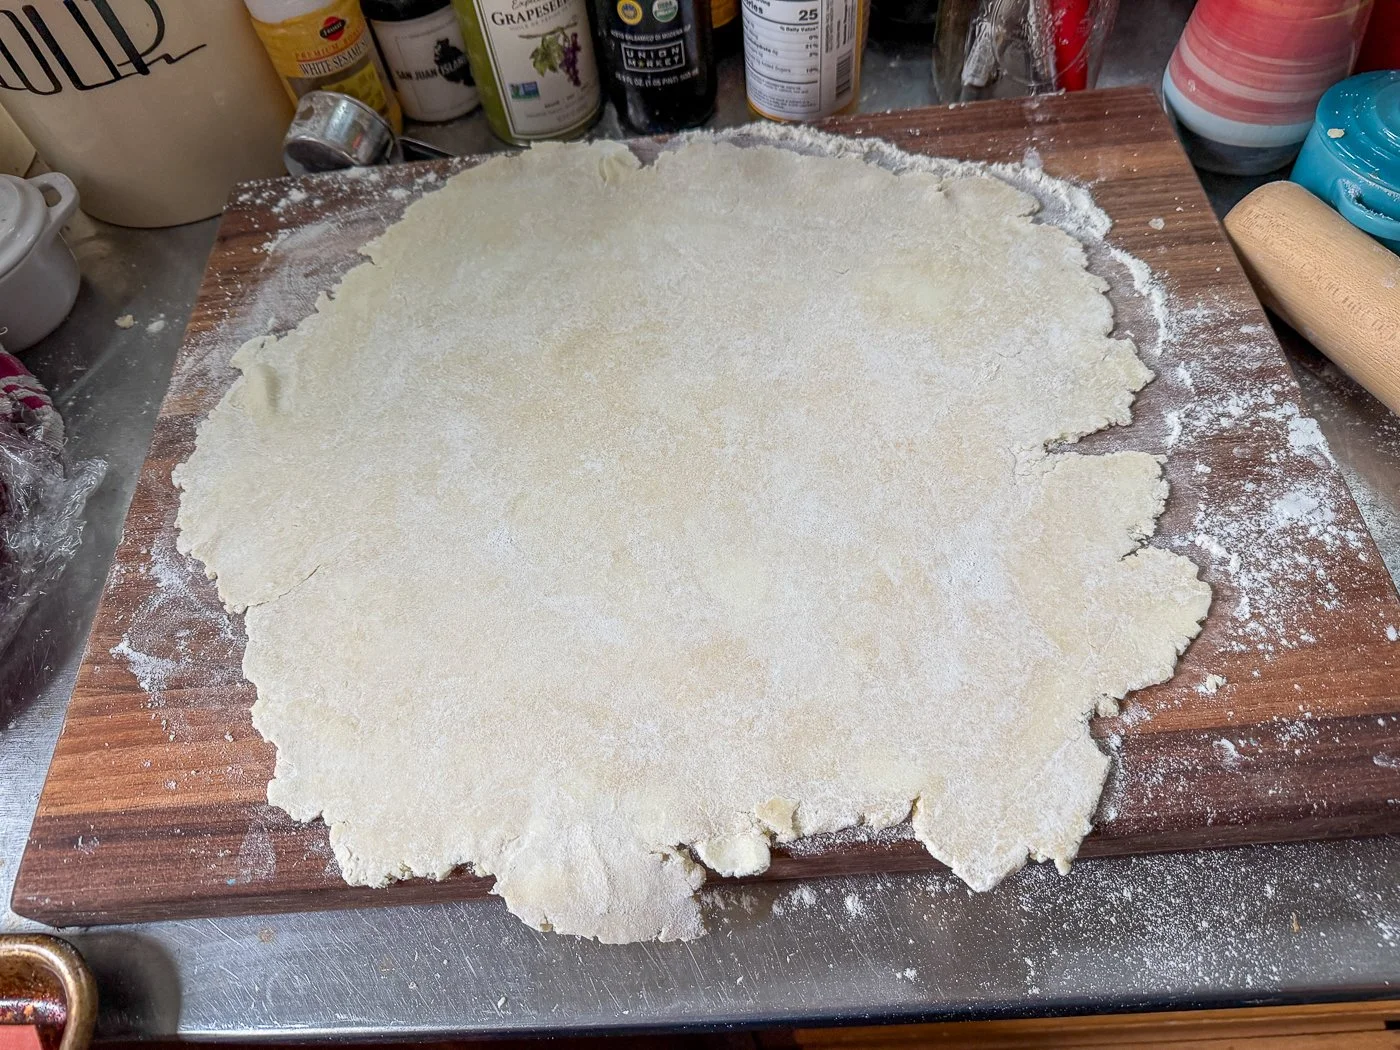
And now it’s time to bring all of the elements together. Heat your oven to 400 degrees with a rack set in the middle. Set a 9-inch pie plate on a baking sheet lined with a Silpat or parchment paper. Flour a large wooden cutting board or your kitchen counter (marble would be ideal, I should be so lucky), place one disc of the refrigerated dough on top of that, sprinkle with flour and sprinkle your rolling pin too.
Give the dough a few thwacks in one directions; rotate the dough and give a few thwacks more. Then begin rolling, pressing out from the center, rotating the disc 45 degrees each time, and pressing out again. Keep rotating and rolling, dusting the surface underneath if it becomes sticky (you’ll have to dust at least once). You want to work fast because you want the dough to stay cold. When you have a 12-inch circle or something that looks like a circle, you’re done.
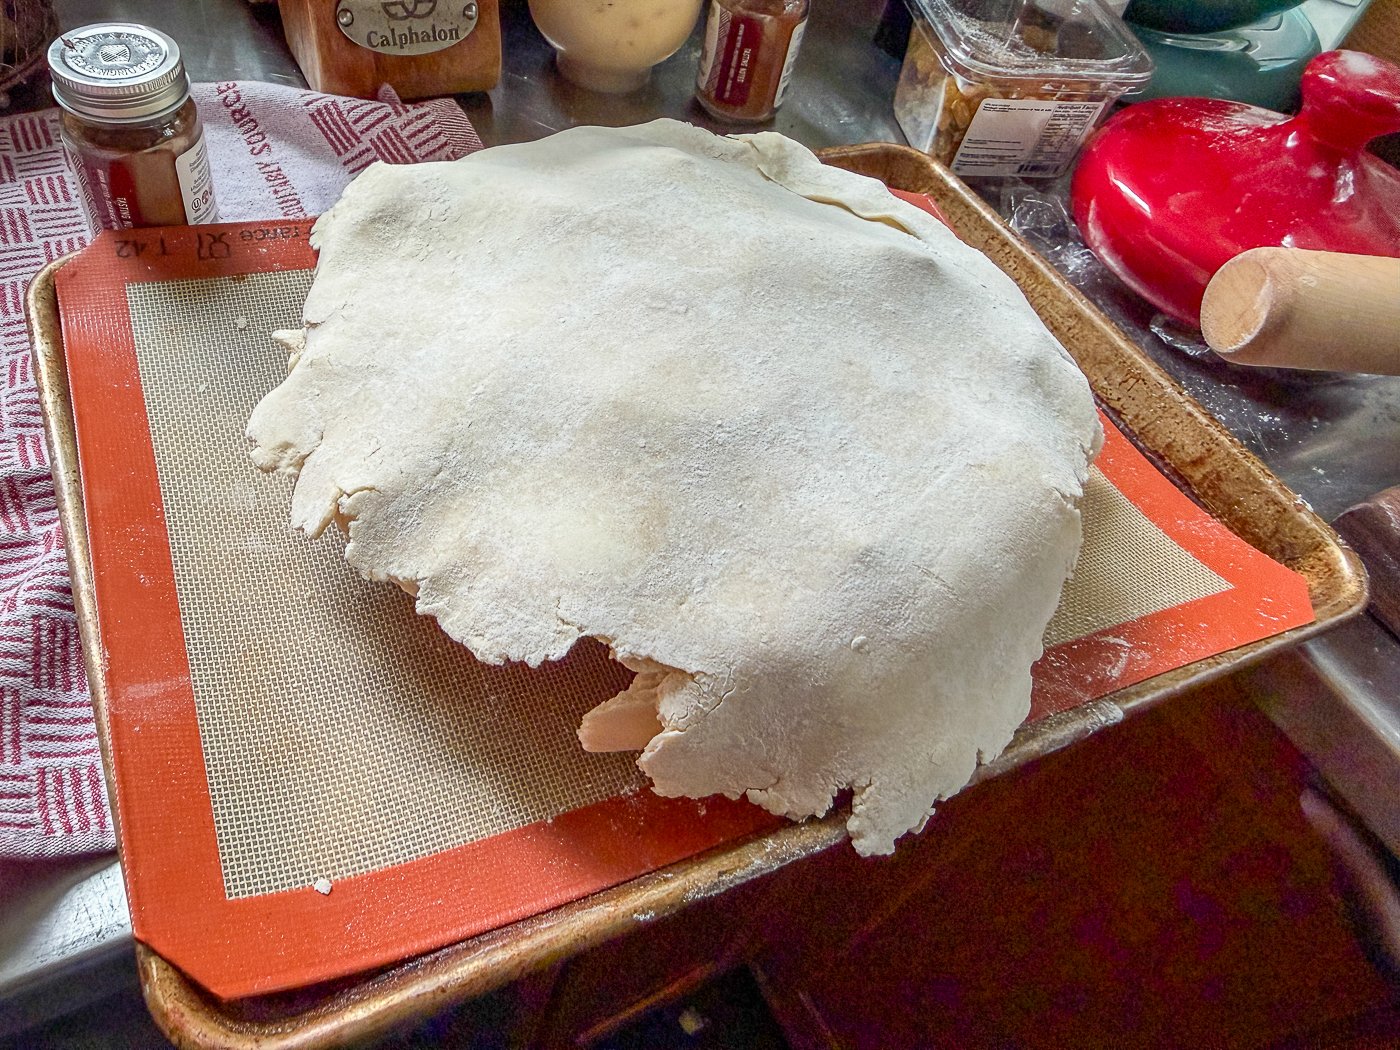
Now just roll that up on your pin and unfurl it over the pie plate, coaxing the dough into the interior without forcing it in.

Add your apples and any juices that’ve collected.

Then roll out the second circle of dough the same way and drape it over the apples.
Step Four: Crimp, Glaze, Sprinkle
Press together the top dough and the bottom dough and try to maintain a one-inch overhang (cut off any excess and use it to patch up any areas that may be lighter on dough). Fold it over towards the center of the pie and pinch as you do so. You should have a perimeter that looks like a solid line. Then, to crimp, use your thumb and pointer finger of your left hand and the thumb and pointer finger of your right hand to make little attractive dents, like the ones you see in this picture.
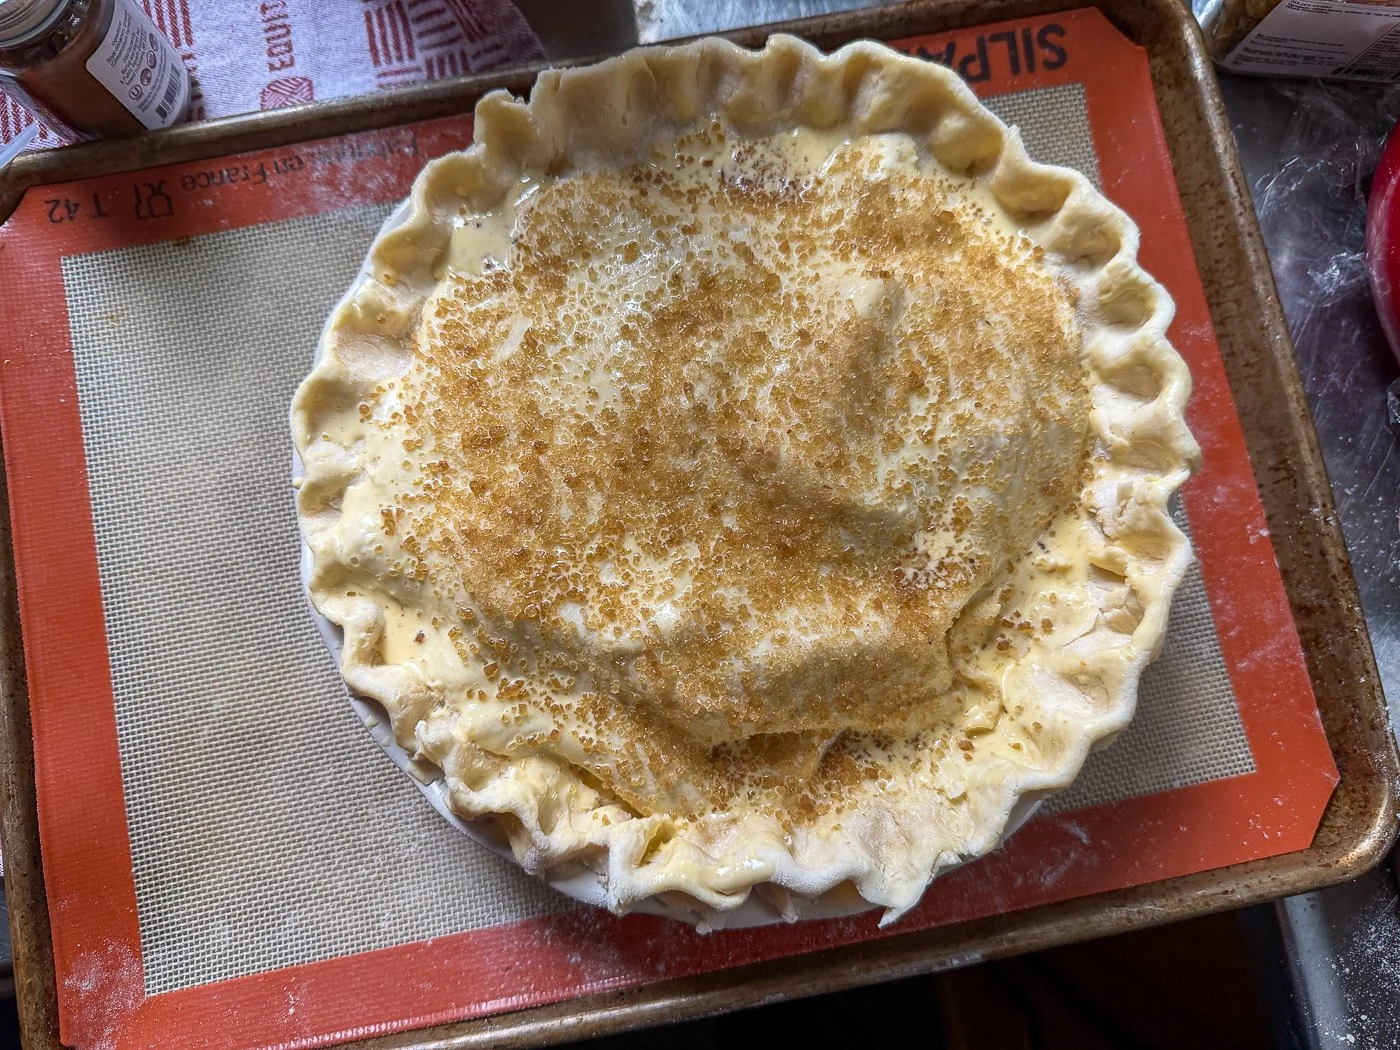
Beat an egg with a tablespoon of cream, brush all over the crust, and sprinkle with a few tablespoons of Turbinado sugar. For extra credit, you can put the pie in the freezer for fifteen minutes so that the crust really maintains its shape.

Step Five: Bake!

Get ready for your kitchen to smell really, really good.
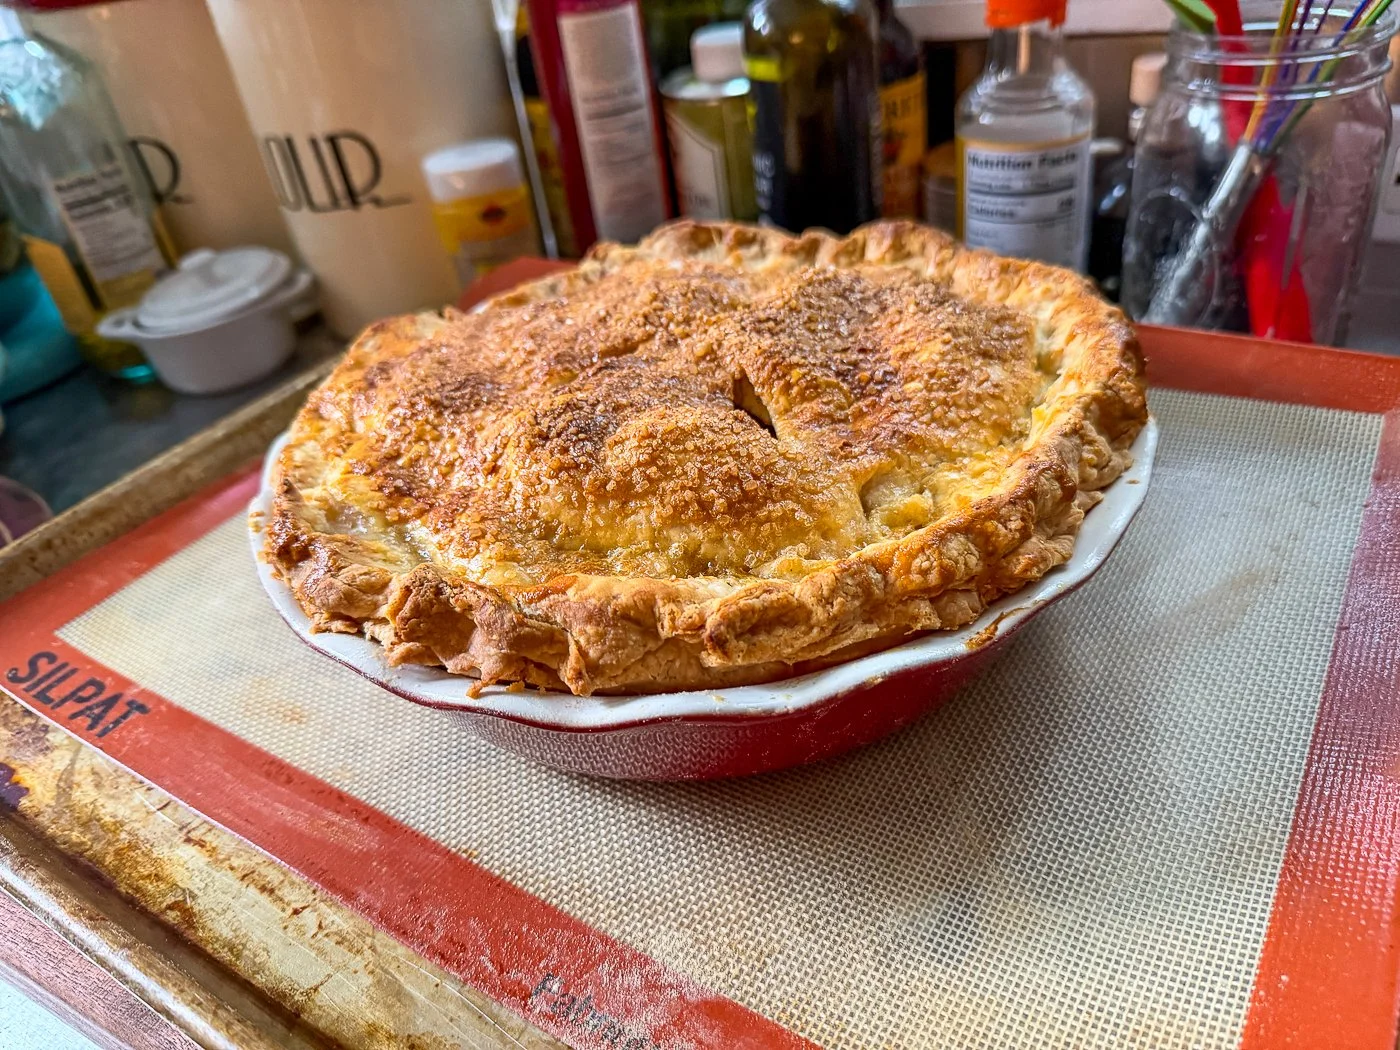
You’ll want to bake this pie for an hour, checking at the end to make sure that the top is a deep golden brown and that the juices on the inside are bubbling. Look at this beauty, fresh out of the oven.
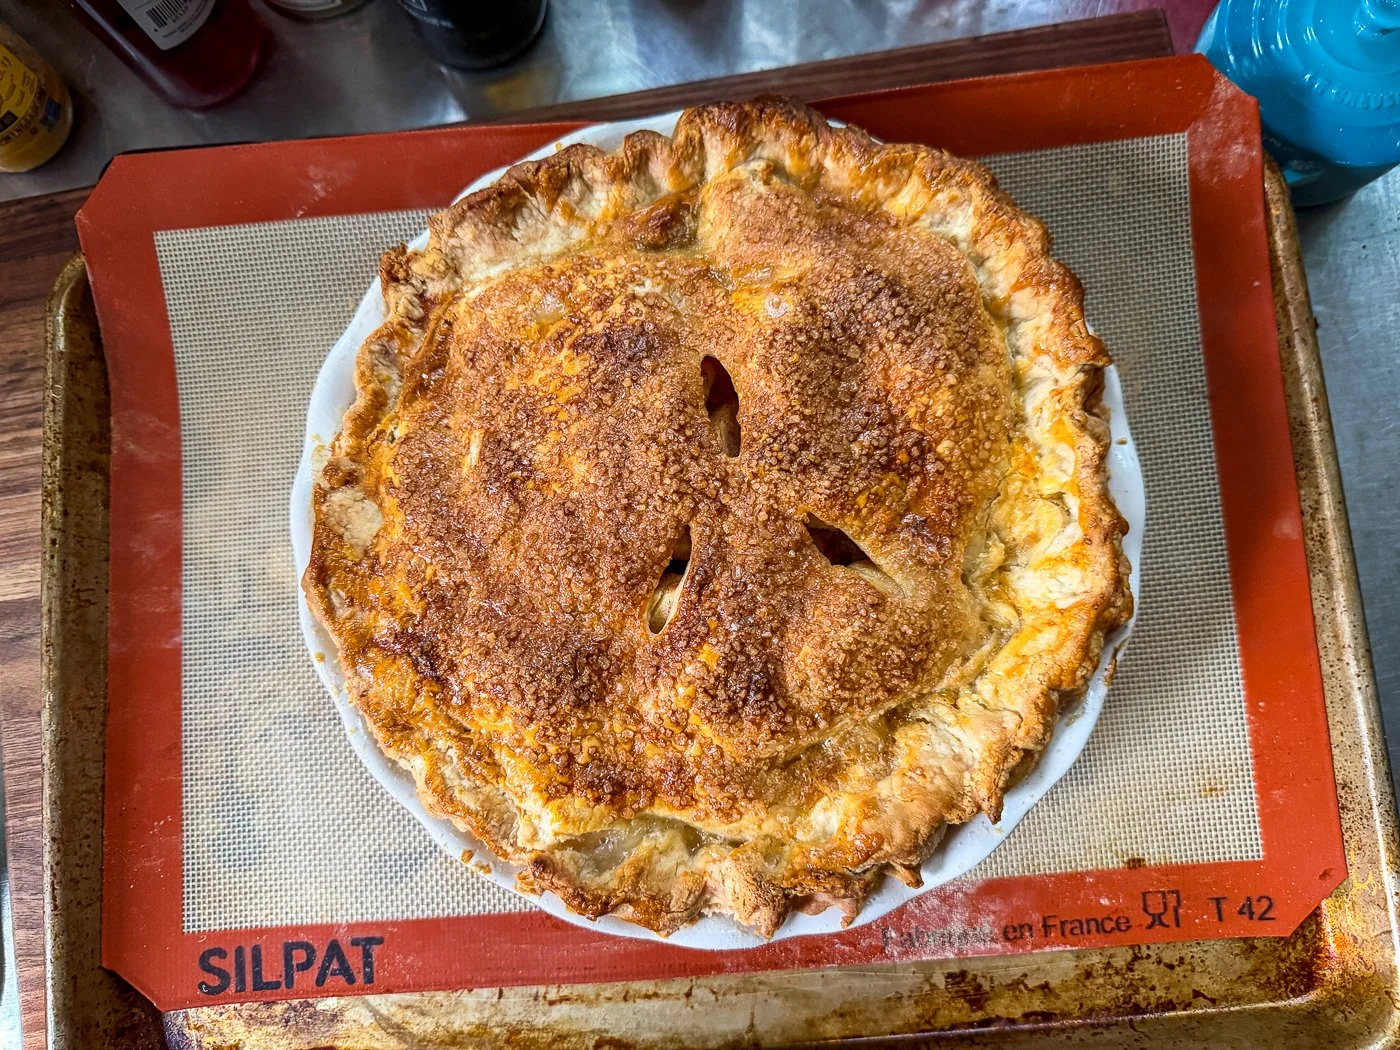
See… was that really so hard?
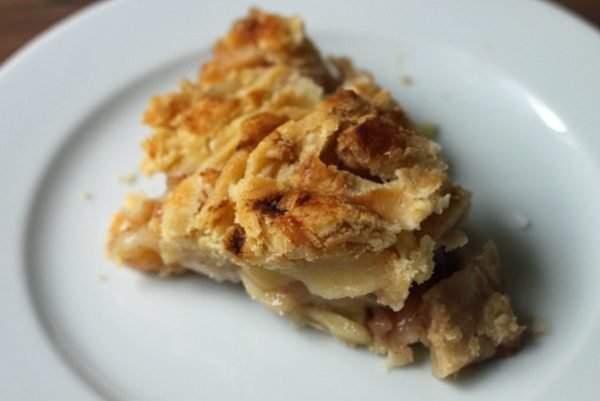
Step Six: Cool, Slice, Serve
Now for the hardest part: letting the pie cool for a few hours before you eat it. That ensures that everything sets up nicely.

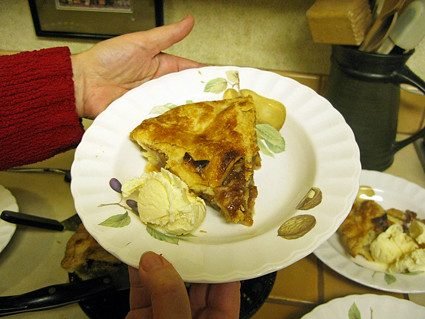
Use a sharp serrated knife to cut the first slice and lift it out with a pie server. Scoop some vanilla ice cream on top and there you are: the perfect — or my perfect — slice of homemade apple pie.


First things first: there’s no such thing as the perfect apple pie. The perfect apple pie is whichever apple pie you love the most. That said: there are good apple pies and there are bad apple pies. Bad apple pies have a stiff, flavorless crustl a gooey, gloppy, synthetic filling. and they taste like something you defrosted from the freezer section instead of something that was made with love.